I’ve lost more plants to root rot than I’d like to admit, and each time it happened, I felt frustrated because I didn’t see the warning signs soon enough.
The leaves looked fine one week, then the whole plant collapsed the next. Over time, I realized root rot doesn’t announce itself loudly. It creeps in quietly, and by the time the plant looks sickly, the roots may already be struggling.
That’s why learning to recognize the early signs has been one of the most valuable skills I’ve gained as a gardener. Catching root rot early gives me a fighting chance to reverse it.
And when I can’t save a plant, I walk away knowing I’ve learned how to prevent it next time. Let me take you through what I’ve discovered about spotting root rot before it’s too late and the steps I take to bring plants back to health.
Why Root Health Matters More Than We Realize
I used to focus almost exclusively on what I could see: leaves, flowers, stems. But with every plant I’ve grown, I’ve come to understand that the real foundation is hidden in the soil.
Strong, healthy roots are the lifeline of a plant, drawing water and nutrients upward. When they’re compromised, it doesn’t matter how perfect the sunlight or fertilizer is, nothing else can compensate.
Roots are vulnerable in ways I didn’t initially appreciate. Stress from irregular watering, poor-quality soil, or even the wrong type of container weakens them.
Once the root system is stressed, it becomes more susceptible to rot. That vulnerability is why so many gardeners lose plants suddenly and can’t figure out what went wrong.
To me, root rot has become the silent thief of plant health. Above the surface, everything might look decent for weeks, while below, decay slowly takes hold.
By the time the symptoms show up in the foliage, the problem is often well underway. Recognizing this “lag time” between root damage and visible symptoms was a turning point in how I care for my plants.
The Earliest Signs Above the Soil
When I suspect root rot, I don’t start by digging up the plant. I start by paying close attention to the subtle changes above ground.
The first clue is often slowed growth, as if the plant suddenly decided to pause. New leaves may stop forming, or existing leaves might look slightly duller.
Another early sign I’ve noticed is unexplained yellowing or wilting, even when the soil feels moist. The tricky part is that these symptoms mimic nutrient deficiencies or lighting issues.
I’ve made the mistake of adding fertilizer when I saw yellow leaves, only to later realize the real problem was hidden beneath the soil.
Leaf drop is another subtle indicator. If a healthy plant begins dropping leaves without a clear reason, I take it seriously. The plant is essentially trying to conserve energy because the roots aren’t functioning properly.
These signs don’t always mean root rot, but they always push me to investigate further.
Also Read: How to Identify and Fix Leaf Spot Before It Takes Over Your Garden
What’s Happening Below the Surface
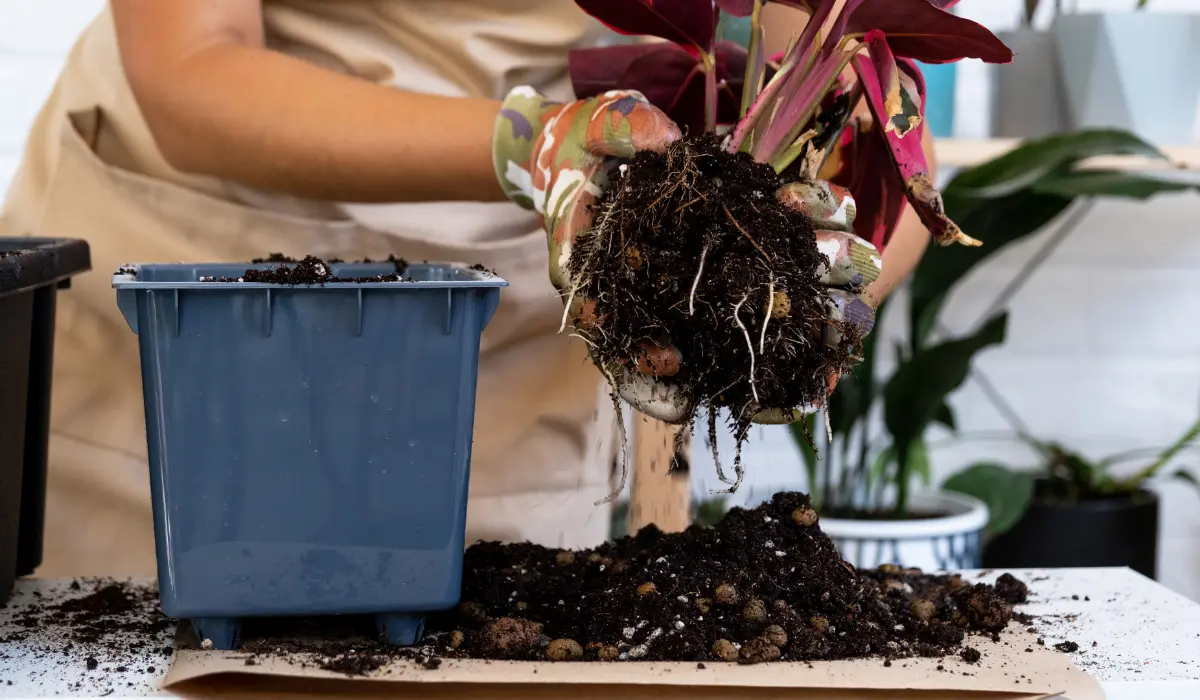
When I gently unpot a plant I suspect has root rot, the difference between healthy and unhealthy roots is usually obvious. Healthy roots are firm, flexible, and white or light tan. They smell earthy, not unpleasant. They give me a sense of vitality the moment I touch them.
By contrast, roots affected by rot feel mushy and may break apart when handled. Their color shifts to brown or black, and a foul, sour odor often rises from the soil.
Sometimes the decay is limited to a few sections, but other times it spreads extensively. That smell is often my confirmation, there’s no mistaking it once you’ve encountered it.
I still remember the first time I truly recognized root rot. I was repotting a peace lily that looked wilted despite regular watering. As I pulled it from the pot, the roots came apart in slimy strands, and I knew the plant was in trouble.
That experience stuck with me and made me far more proactive about checking roots when something seems off.
Common Causes That Trigger Root Rot
Overwatering is the number one culprit in my experience. It creates consistently soggy conditions where roots can’t access oxygen. Plants need water, but they also need air around their roots. Too much water literally suffocates them, opening the door for rot to begin.
Poor drainage compounds the problem. I’ve learned the hard way that decorative pots without drainage holes are a gamble. Even well-meaning habits, like leaving a saucer full of water under a plant, can lead to roots sitting in stagnant moisture. It doesn’t take long for this to create ideal conditions for rot.
Pathogenic fungi also play a role. In waterlogged soil, fungi like Pythium thrive and attack weakened roots. This is why compacted soil or heavy mixes designed for outdoor beds often fail in pots.
A plant’s environment, from the soil to the container, either protects the roots or sets them up for disaster.
Diagnosing Root Rot with Confidence
I’ve developed a routine for diagnosing root rot that avoids shocking the plant unnecessarily. If symptoms point strongly to root problems, I slide the plant carefully from its pot.
I never yank, it risks breaking already fragile roots. Instead, I tip the pot and gently loosen the soil until the root mass releases.
Once exposed, I rely on three checks: color, texture, and smell. If roots are pale and firm, I rule out rot. But if they’re discolored, mushy, or foul-smelling, I know I’ve confirmed the diagnosis.
The combination of these factors leaves little doubt. It’s a more reliable method than guessing based on leaf color alone.
The key is distinguishing root rot from other stressors. For example, nutrient deficiencies might cause yellow leaves, but the roots remain healthy.
Similarly, underwatered plants may wilt, but their roots are dry and wiry, not slimy. These distinctions help me avoid misdiagnosis and wasting time on the wrong solution.
Steps to Save a Plant in Early Stages
When I catch root rot early, I don’t panic, I act quickly. The first step is pruning away the affected roots with sterilized scissors. I cut back until only firm, healthy tissue remains. It feels harsh sometimes, but leaving decayed roots only allows the rot to spread.
Next, I disinfect the tools and even rinse the roots with clean water to remove lingering pathogens. Some gardeners use diluted hydrogen peroxide, and I’ve found it helpful in severe cases.
The goal is to give the plant a truly fresh start. Afterward, I repotted in new, well-draining soil and a container with ample drainage holes.
The recovery stage is delicate. I keep the plant in bright, indirect light and resist overwatering. It often takes weeks before I see signs of new growth.
But when I do, it’s proof that the plant has redirected its energy into rebuilding roots. That patience has rewarded me with many plants I thought I might lose.
Also Read: Here are 7 Smart Ways to Use Cornstarch in the Garden, According to Experts
When It’s Too Late (And Why That’s Okay)
Not every plant can be saved, and accepting that has been a humbling part of gardening. Sometimes I discover root rot only after it has destroyed the majority of the root system. At that point, the plant simply can’t recover.
I’ve learned to recognize this stage: when almost all the roots are mushy, the plant collapses quickly, and even supportive care makes no difference.
It’s heartbreaking, but it’s also a reality of working with living organisms. Not every battle can be won.
What helps me is shifting perspective. Losing a plant teaches me to sharpen my observation skills and refine my care routines. Each failure builds knowledge, and that knowledge prevents future losses. In a way, every plant lost to root rot has made me a more attentive and resilient gardener.
Long-Term Prevention Habits That Work
Today, prevention is at the heart of how I garden. I’ve trained myself to water based on a plant’s actual needs, not on a rigid schedule. I check soil moisture before watering, and I remind myself that it’s better to let the soil dry slightly than to drown roots.
Choosing the right soil mix has also been transformative. For most houseplants, I prefer a blend that’s light, airy, and fast-draining.
Adding perlite, bark, or sand keeps water from pooling and ensures roots can breathe. The container matters too, pots with drainage holes are non-negotiable.
Finally, I’ve built prevention into my routine by making root checks part of repotting. Each time I repot, I take the opportunity to examine the root system.
This habit gives me peace of mind and often allows me to spot early issues before they spiral into something worse. Prevention isn’t complicated; it’s just consistent awareness.
Final Thought
Root rot once felt like an invisible enemy I couldn’t defeat, but now I see it as a manageable challenge. By learning to recognize the early signs, both above the soil and within the root system, I’ve saved countless plants.
Every gardener encounters root rot at some point, but it doesn’t have to be devastating. With experience, I’ve learned to act quickly, respond with the right steps, and move forward with more confidence.
And the best part is, each plant that survives root rot comes back stronger, just like the gardener who saved it.
FAQs
Check the roots, firm and white means overwatering; mushy and dark means rot. Yes, in dilution, but only as part of treatment with pruning and fresh soil. Yes, poor drainage or heavy rain can cause it outdoors, too. Anywhere from a few weeks to several months, depending on the plant and severity. How do I tell the difference between overwatering and root rot?
Should I use hydrogen peroxide to treat root rot?
Can root rot happen in outdoor garden soil, not just pots?
How long does it take a plant to bounce back after treatment?